

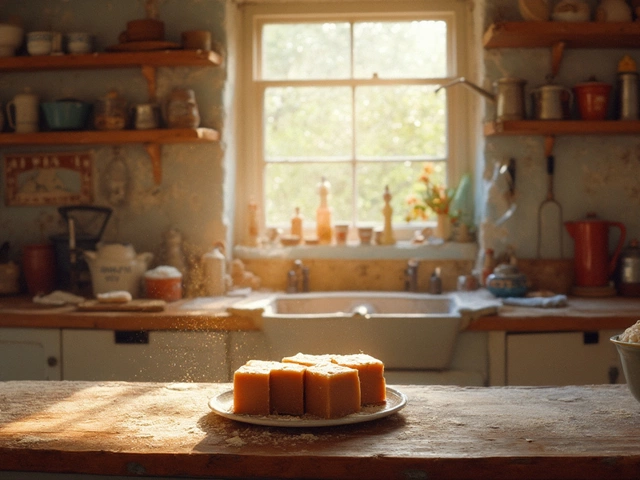
Got your heart set on enjoying some rich, melt-in-your-mouth fudge, but it's turning out gritty instead? That probably means sugar crystals have crashed the party. Let's put a stop to that. You might be surprised how even slight tweaks in your process can make a world of difference.
First things first—understanding what sugar is doing while you cook is key. When you're making fudge, you're aiming for smoothness, which is all about controlling those sugar crystals. When sugar gets heated and then cools down at just the right rate, it stays nice and creamy. But stray crystals can act like a snowball rolling downhill, leading to a gritty feel if they start to form. So, the real trick is stopping them before they get a chance to do their thing.
- Understanding Sugar and Its Role
- Why Sugar Crystals Form in Fudge
- The Right Cooking Temperature
- Stirring Techniques and Tools
- Using Additives Wisely
- Troubleshooting Common Issues
Understanding Sugar and Its Role
Alright, so let's get into why sugar is both the magic and the villain of your fudge-making adventure. We all know sugar is what makes fudge sweet and delicious. But, it's not just about the taste. It's the backbone of the fudge's structure, giving it the right texture when everything goes to plan.
When you heat sugar, it melts and starts to dissolve in water. As the mixture cooks, water evaporates, and sugar becomes more concentrated, crucial for creating that rich, chewy consistency we love. Reach the right temperature, and you've got the perfect balance. If you hit that sweet spot, congrats, your fudge will be smooth.
However, things go south if a few sugar crystals sneak in. They can cause a chain reaction, making the whole batch gritty. Think of these sneaky crystals as the bad apples of the fudge world.
Now, how does this all translate into action in your kitchen? Here are a few must-knows:
- Melt sugar evenly by stirring gently and consistently.
- Use a wet pastry brush to wash down sugar crystals from the sides of the pot while cooking.
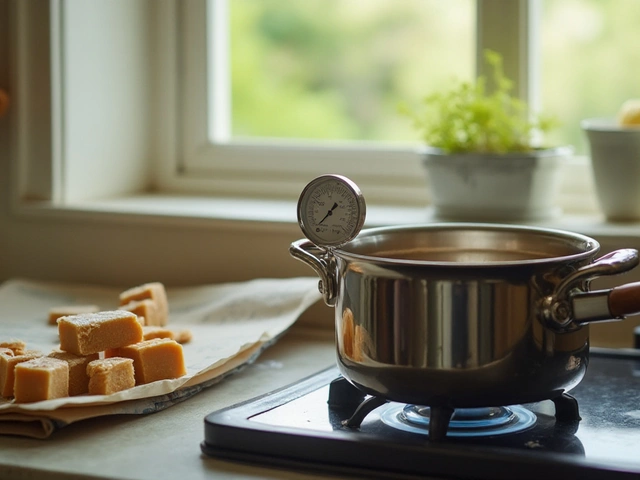
- A digitally calibrated candy thermometer is your best friend for getting the perfect temperature, usually around 234-240°F (112-116°C).
Remember, temperature control is everything. Too high, and it’s gritty—too low, and it’ll never set. So, understanding sugar's role isn't just a kitchen lesson; it's the key to mastering those heavenly homemade fudge bites!
Why Sugar Crystals Form in Fudge
Alright, let's dig into why those crystals even show up in the first place. It's all about sugar's natural tendency to recrystallize. When you're making homemade fudge, you're cooking up a sugar syrup. As this syrup cools, sugar naturally wants to form its usual crystal structure.
This might sound a bit science-y, but hang in there. When sugar hits a certain concentration and temperature, it becomes basically like a kid in a candy store—it can't help but form crystals if given the chance. Even a single undissolved bit of sugar can start the whole process. That's why achieving the right sugar concentration and temp is non-negotiable.
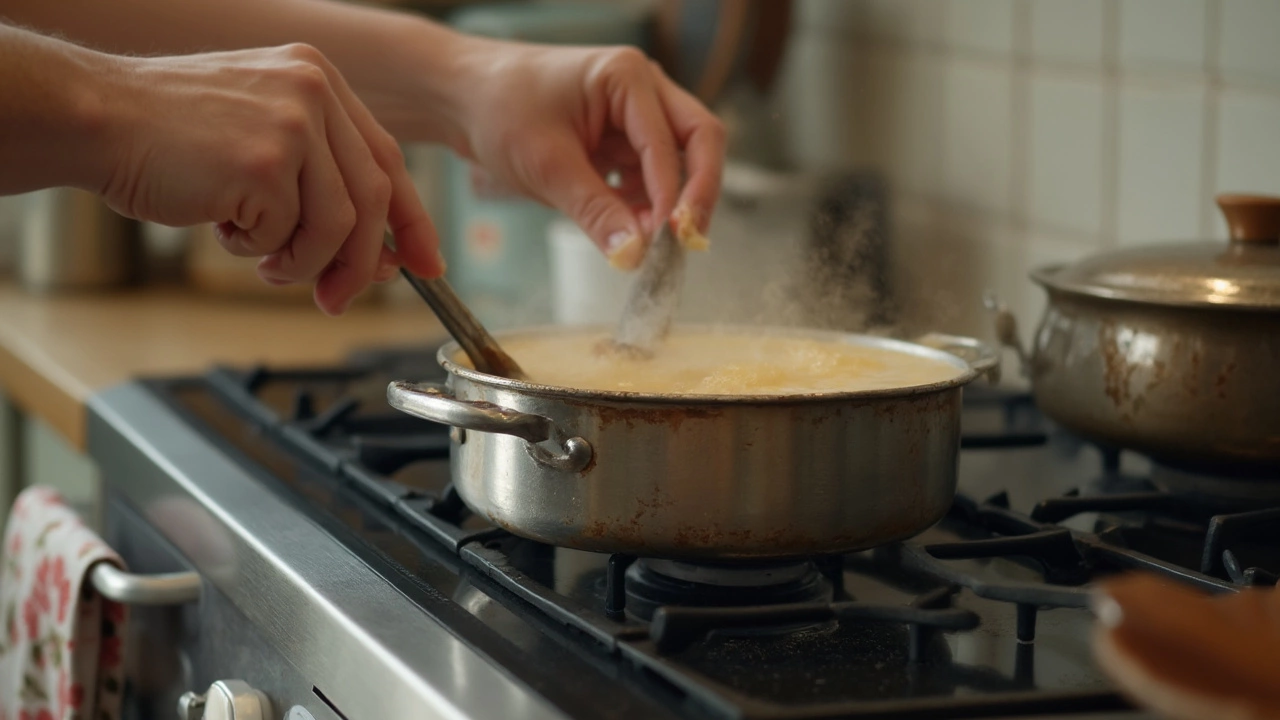
A couple of sneaky culprits can make things worse, too. Stirring too much or too early while the fudge cools can trigger crystal formation, like giving those eager sugar molecules a head start. Even stray sugar particles from the sides of your pan can find their way in, acting like rock stars at a concert, pulling others to join them.
But don't worry, keeping an eye on these factors can really help. Using a wet pastry brush to stop sugar particles on the pan's side from hopping in can do wonders. And try holding back on stirring until the mixture has cooled a bit. This way, you'll avoid setting off the crystal chain reaction, ensuring your fudge stays smooth and creamy.
The Right Cooking Temperature
Getting the temperature spot on is huge when it comes to making that dreamy smooth fudge. So, what's the magic number? Well, you're aiming to heat your fudge mixture to 234-240°F (that's about 112-115°C if you're more metric-minded). In the candy world, this is called the 'soft-ball' stage.
This temperature is crucial because it's when sugar and liquid bond just right, setting the stage for a smooth finish. Too hot, and you'll end up with something more like caramel; too cool, and it's just a sad grainy blob.
Cooking with precision doesn't mean eyeballing it. You'll need a trusty candy thermometer. Seriously, it’s like your fudge's best friend. Clip it to the side of your pot without letting it touch the bottom, to avoid inaccurate readings. And remember, patience, my friend. Heating slowly and steadily allows the sugar to dissolve properly, reducing the chance of rogue crystals forming.
Here’s a nifty little step-by-step guide:
- Combine your sugar, milk, butter, and any other basic ingredients in a heavy-bottomed pan. This type of pan helps distribute heat evenly.
- Heat over medium until sugar dissolves, stirring gently.
- Once the sugar’s dissolved, crank up the heat a notch and stop stirring. No more mixing—this stops unwanted sugar crystals from sneaking in.
- Watch your thermometer carefully. When you hit that sweet 234-240°F range, take the pot off the heat and let it cool down without stirring until it reaches about 110°F.
- After it cools, beat it until it's thicker and loses its gloss for that perfect texture.
Homemade fudge is all about timing and temperature. With these steps, you should be able to tackle those pesky sugar crystals and get that smooth, mouth-watering fudge every time.
Stirring Techniques and Tools
Nailing the stirring technique is a game-changer when it comes to creating perfect, creamy fudge. Ever notice those old-timey cooking shows where chefs carefully stir with precision? There’s a reason for that.
First thing’s first, always use a trusty wooden spoon or a heat-resistant silicone spatula. Metal utensils can be too sharp and they might accidentally invite sugar crystals by scraping the sides of your pot where the mixture could cool and crystallize faster.
Speaking of pots, don’t underestimate the power of a good one. Opt for a heavy-bottomed pan. It helps distribute heat evenly, avoiding any hot spots that can trigger sugar to crystalize before you know it.
A crucial tip for stirring: once your sugar is fully dissolved and the mixture starts boiling, resist the urge to stir continually. Overstirring lets those pesky sugar crystals form and cling to your spoon or the pot. Instead, just give it an occasional gentle nudge to keep the temperature even.
If you want to add a splash of preparation excellence, use a pastry brush dipped in water to wipe down the sides of the pot at the early stages of boiling. This prevents sugar crystals from accumulating along the edges, which could fall back into the mixture and cause grittiness.
Getting the stirring right is like the unsung hero of the homemade fudge world. By paying attention to these little details, you set the stage for a smooth, scrumptious, and utterly delightful dessert.
Using Additives Wisely
Think doing everything by the book doesn't always cut it when making homemade fudge? Time to explore the magic of additives! These little helpers can save the day, keeping those pesky sugar crystals from ruining your sweet masterpiece.
The most popular aid in the fudge world is corn syrup. Just a small amount can make a big impact. Why? Well, corn syrup breaks up sugar's natural ability to form crystals. It acts as a buffer and keeps that sugar smoother than a jazz sax solo. Just remember, less is more. Toss in a tablespoon to your fudge recipes for that extra nudge toward creamy goodness.
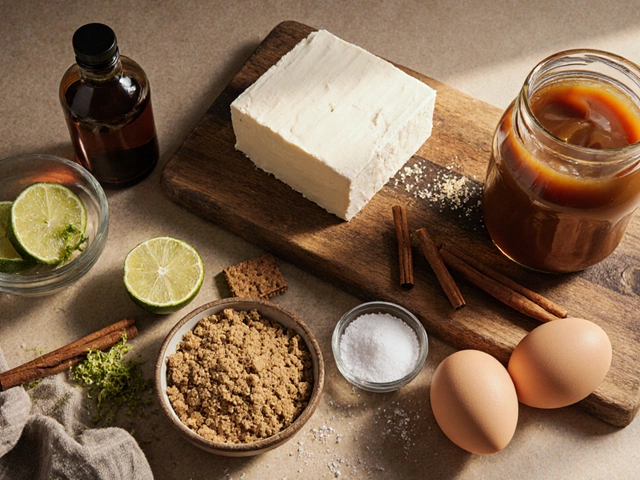
Another trusty ally is butter—or even better, unsalted butter for a cleaner flavor. Butter adds fat, which also helps coat sugar molecules and keeps them from cozying up in unwanted clumps. Here’s a neat tip: Stir in the butter when you finish cooking your syrup, before it cools.
Don't write off cream of tartar, either! This unsung hero stabilizes sugar molecules, making them less likely to form crystals. Just a pinch is usually enough to keep your homemade fudge on the smooth side of town.
In some cases, you might find glycerin in fudge recipes. It’s not just for skin care! While popular in professional circles, it helps maintain moisture and prevents your fudge from drying out, indirectly fighting crystal formation.
Don't get overwhelmed by options—using one or two of these additives should do the trick. And remember, the idea is to control, not overcomplicate. Armed with these tips, you're well on your way to making sure your fudge is creamy and smooth every single time!
Troubleshooting Common Issues
So, you're all set to enjoy your homemade fudge, but there it is—gritty and not what you hoped for. Let's sort out these common hiccups by breaking them down step-by-step. Good thing there's usually a simple fix!
First up, check your cooking temperature. A common issue comes from overheating or underheating the sugar mix. Use a candy thermometer to keep the mix at the sweet spot, which is around 234°F to 240°F (that’s the soft-ball stage). Anything outside this range, and you're inviting those pesky sugar crystals.
Did the mix start to seize on you? That can happen if sugar crystals form on the side of the pot. To avoid this, gently wash down the sides with a wet pastry brush as it cooks. Also, avoid stirring too much once it's boiling. Over-stirring can introduce unwanted crystals into the mix.
Let's talk about cooling down the fudge. If you rush this step, sugar can crystallize more easily. Give your fudge time to cool naturally to around 110°F before beating it. This gradual cooling helps ensure it sets up nice and smooth.
If your fudge is stubbornly difficult, try adding a little corn syrup or cream of tartar. These can help break down sugar and reduce crystallization without impacting that classic fudge flavor.
Here's a quick checklist to keep handy:
- Always use a candy thermometer.
- Keep a wet pastry brush nearby to prevent crystals on the pot's edge.
- Be patient—give your fudge time to cool slowly.
- Stir gently once it's boiling.
- Consider additives like corn syrup to stabilize your mix.
Armed with these tips, your next batch should be smoother and more enjoyable. Sometimes it's all in these little tweaks that make homemade fudge a sweet success!


Write a comment