
Fudge Temperature Calculator
Fudge needs to reach the soft-ball stage (234-240°F / 112-116°C) to set properly. This calculator checks if your mixture has reached the right temperature and gives specific advice.
Result
Enter your temperature to see if it's in the ideal range.
Nothing beats the rich, creamy texture of homemade fudge - until it doesn’t set. Or turns grainy. Or sticks to the pan like glue. You followed the recipe exactly, measured everything to the gram, and still, your fudge looks more like caramel sauce than a dessert you can slice. It’s frustrating, and it happens more often than you think. The truth? Fudge is simple in theory but unforgiving in practice. One wrong step, and you’re back to the drawing board.
It’s Not About the Recipe - It’s About the Temperature
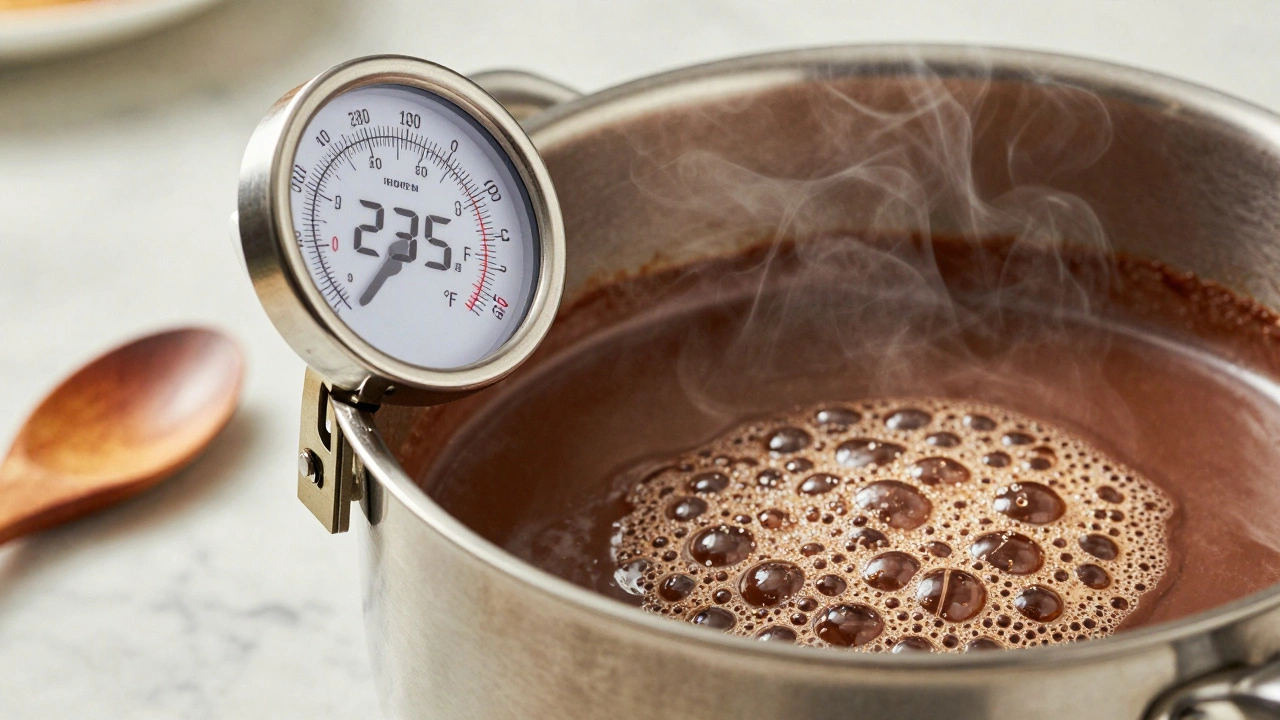
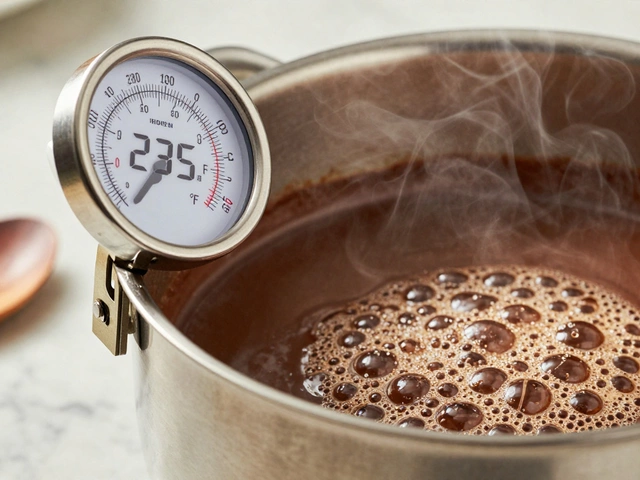
The most common reason fudge fails? Temperature. Fudge isn’t just melted chocolate and sugar. It’s a precise sugar syrup that needs to reach the soft-ball stage: 234-240°F (112-116°C). If you skip the candy thermometer, you’re gambling. Sugar boils at 212°F, but fudge needs to go higher. Too low, and the syrup won’t crystallize properly - your fudge stays soft, sticky, and won’t hold its shape. Too high, and you’ll get hard, crumbly fudge that tastes like burnt sugar.
Most home cooks rely on the ‘cold water test’ - dropping a spoonful into ice water to see if it forms a soft ball. But that’s unreliable. Humidity, altitude, even the type of pot you use changes how fast sugar heats. A digital candy thermometer is the only real insurance. Look for one with a clip that attaches to the side of the pan. Set it to alert you at 235°F. When it beeps, you’re ready to move to the next step.
Stirring Too Soon Turns Fudge Grainy
Here’s the secret most recipes don’t tell you: don’t stir the mixture while it’s boiling. Once the sugar, butter, milk, and chocolate come to a boil, let it cook undisturbed until it hits temperature. Stirring during this phase introduces sugar crystals that cling to the sides of the pan. When you finally stir it after removing from heat, those crystals spread - and your fudge turns gritty instead of smooth.
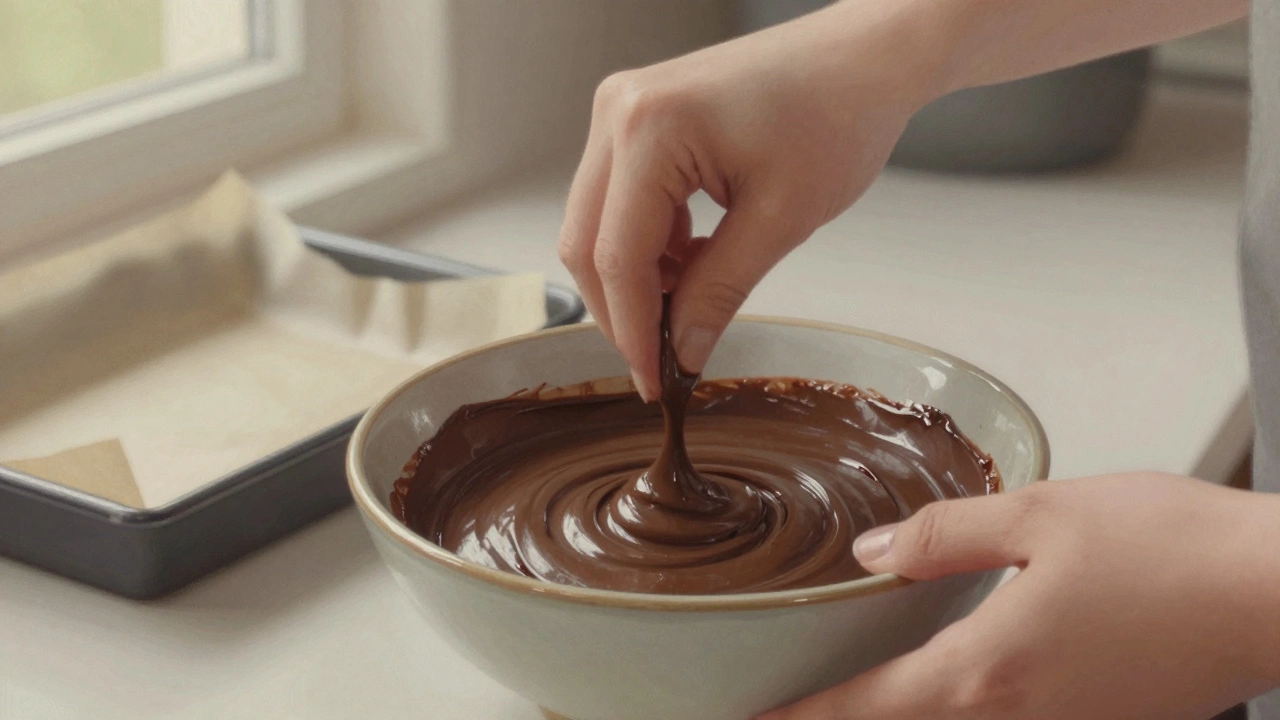
Use a silicone spatula to scrape the sides of the pan before you start cooking. That’s it. No stirring. No swirling. Just wait. After you take it off the heat, wait five minutes before stirring in the vanilla and chocolate. That cooling period lets the sugar syrup stabilize. Then, stir slowly and steadily for about two minutes until it loses its shine. That’s when the crystals form evenly - not in clumps, but as a silky, uniform texture.
Using the Wrong Chocolate Makes a Big Difference
Not all chocolate is created equal for fudge. If you use chocolate chips, you’re asking for trouble. Most chocolate chips contain stabilizers to keep their shape in cookies - they don’t melt smoothly. That’s why your fudge might feel waxy or separate into oily streaks. Stick with high-quality baking chocolate: bars with at least 60% cocoa. Chop them yourself. They melt evenly, blend better, and give you that deep, rich flavor you can’t fake.
Same goes for cocoa powder. Use natural unsweetened cocoa, not Dutch-processed, unless your recipe specifically calls for it. Dutch-processed cocoa has been treated with alkali, which changes how it reacts with other ingredients. It can throw off the chemistry, especially if you’re using baking soda. Stick to the kind labeled ‘unsweetened’ and ‘natural’ - it’s the standard for fudge.
Humidity Is Your Silent Saboteur
If you live in a humid climate - or it’s a rainy day - your fudge might never set right. Sugar is a magnet for moisture. On humid days, the sugar in your fudge starts pulling water from the air. That’s why your fudge feels sticky, doesn’t slice cleanly, or melts in your hands within minutes.
There’s no perfect fix, but you can work around it. Make fudge on dry days if you can. If you must make it on a humid day, turn on your air conditioner or use a dehumidifier in the kitchen. After you pour the fudge into the pan, let it set uncovered in the fridge, not on the counter. Cover it only after it’s completely firm. And store it in an airtight container with a piece of parchment paper between layers. That keeps moisture out.
Overcooking or Burning the Sugar
Fudge burns easily - and it doesn’t always look like it. You might think you’re being careful, but sugar caramelizes fast. If your fudge tastes bitter or smells like burnt popcorn, you’ve overcooked it. The bottom of the pan is the hottest spot. Use a heavy-bottomed saucepan - aluminum or thin stainless steel will scorch. Glass or ceramic pans won’t work either; they heat unevenly.
Keep the heat on medium. Don’t crank it up to save time. Stir the mixture gently at the start to dissolve the sugar, then leave it alone. If you see even a hint of darkening around the edges, take it off the heat immediately. You can still salvage it by adding a splash of cream and reheating gently - but you’ll lose some texture. Prevention is better than rescue.
Not Cooling Before Cutting
Patience is the final ingredient. Many people rush to cut their fudge as soon as it’s in the fridge. That’s a mistake. Fudge needs at least two hours - ideally four - to set fully. If you cut it too soon, the edges crumble, the center stays gooey, and the whole batch looks messy.
Line your pan with parchment paper before pouring. That makes lifting the whole slab out easy. Let it sit at room temperature for 30 minutes after pouring, then move it to the fridge. Don’t rush the fridge - cold helps it set, but not if it’s still too warm. When it’s firm enough to hold its shape when you press it lightly, it’s ready. Use a sharp knife dipped in hot water and wiped dry. That gives you clean, crisp edges every time.
Why Your Fudge Sticks to the Pan
If your fudge clings to the pan like glue, you didn’t prepare the pan right. Greasing with butter isn’t enough. Butter has water in it - and water makes fudge sticky. Use nonstick spray with flour, or line the pan with parchment paper. If you use parchment, grease the paper lightly with coconut oil or shortening. That’s the trick. No sticking. No tearing. Just easy removal.
Another cause? Not letting it cool enough. If you try to lift it before it’s fully set, it’ll tear. Give it time. Wait until it’s cold and firm. Then, lift the edges of the parchment paper and gently peel it up. Slide a thin spatula under the slab if needed. Don’t force it.
What to Do When It’s Already Ruined
Don’t throw it out. Even if your fudge is too soft, too grainy, or too sweet, you can still turn it into something delicious. Soft fudge? Warm it gently in a saucepan with a tablespoon of cream, then pour it into a dish and chill again. Grainy? Blend it into a milkshake with ice cream and a splash of vanilla. Burnt-tasting? Use it as a sauce over pancakes or ice cream. Fudge is forgiving - you just need to rethink its form.
Some people even turn failed fudge into truffles. Roll the mixture into balls, coat them in cocoa powder or crushed nuts, and chill. They won’t look like traditional fudge, but they’ll taste just as rich.
Quick Checklist for Perfect Fudge Every Time
- Use a candy thermometer - no exceptions
- Don’t stir while boiling - wait until off heat
- Use baking chocolate, not chips
- Use natural unsweetened cocoa powder
- Make fudge on dry days, or use a dehumidifier
- Use a heavy-bottomed saucepan
- Line the pan with parchment paper and grease it
- Let it cool for at least 4 hours before cutting
- Use a hot, dry knife to slice cleanly
Fudge doesn’t need to be complicated. It just needs respect. Treat it like a science project, not a snack. Measure carefully, wait patiently, and don’t cut corners. The reward? A square of fudge that melts on your tongue, rich and smooth, with no grit, no stickiness, no regrets.
Why is my fudge grainy?
Grainy fudge happens when sugar crystals form unevenly - usually because you stirred the mixture while it was boiling, or didn’t scrape the sides of the pan before cooking. Once crystals form on the sides, they fall into the syrup and multiply as you stir later. Always let the mixture boil undisturbed, and use a wet pastry brush to wash down any sugar crystals on the sides before it reaches a boil.
Can I make fudge without a candy thermometer?
You can, but it’s risky. The cold water test - dropping a spoonful into ice water to see if it forms a soft ball - is the traditional method. But humidity, altitude, and even the temperature of your ice water can throw it off. A candy thermometer is far more accurate. If you don’t have one, buy one. They cost less than $10 and make fudge foolproof.
Why won’t my fudge set?
If your fudge won’t set, it likely didn’t reach the right temperature - 234-240°F. Sugar syrup needs to boil long enough to evaporate enough water. If you rushed it or used a pan that didn’t conduct heat well, the mixture never got hot enough. Reheat it gently, bring it back to temperature, then cool and stir again. It should set properly.
Can I use evaporated milk instead of regular milk?
Yes, and many recipes actually prefer it. Evaporated milk has less water, so the fudge thickens faster and has a creamier texture. It’s a common substitution in classic Southern fudge recipes. Just make sure it’s unsweetened evaporated milk - not sweetened condensed milk. The latter is way too sugary and will ruin the balance.
How long does homemade fudge last?
Stored in an airtight container at room temperature, fudge lasts about 2 weeks. In the fridge, it can last up to a month. Freeze it for up to 3 months - wrap each piece in parchment paper first to prevent sticking. Always let it come to room temperature before eating. Cold fudge tastes dull and feels waxy.


Write a comment